Introducing: Soft Like Kittens

I'm really excited to be starting a special new series on my blog today. I'd like to call it "Let's Meet some Lovely Crafters & Designers and Ask Them Lots of Questions", but that title is a bit long. So I've settled for "Introducing: ... " and I'm looking forward to introducing you to some of the fabulous crafters and designers that I meet, as I go about learning new things to make my Handmade Wardrobe.
Today we're starting with Annette from Soft Like Kittens. I've talked about Annette before - she's an indie yarn dyer from New Zealand, with a fantastic eye for colour and enviable attention to detail. The yarn for the Kiwi socks that I'm knitting for Mr Myrtle came from her, and she custom dyed the beautiful tangerine yarn for my Firefly bag in Outfit 3. I've loved knitting with both bases and I've got more of her colourful loveliness stashed away...
Annette began dyeing and selling yarn under the label Soft Like Kittens last year. She's got a number of base yarns that she dyes, including merino, BFL and bamboo mixes, in fingering, sport and DK weights. And, as well as a range of regular colourways, she dyes some wonderful "prototypes". It's worth watching out for those because they go quick!
When I decided to dye the yarn for my cardigan in Outfit 4, my first thought was: "How?" and my second was: "I'll ask Annette." And, I did.


I sent her a bunch of questions, and her answers were so helpful I thought it would be fun to share them with you. Here goes!
What size pot do I need?
To get a relatively solid colour for a sweater's worth of yarn it would be preferable to dye the whole lot in one batch, though this will require a LARGE pot - I usually figure a minimum of 3L of water per 100g of yarn.
Do I need a different pot or can I use my kitchen pots?
It does need to be dedicated to dyeing and shouldn't have food cooked in it again afterwards. If you don't want to make the investment in that size stainless steel pot you could dye smaller batches and be very careful about your measurements. Either way I'd recommend alternating skeins when knitting as there will always be slight variations in a hand dyed yarn.
How do I assess how dark my dye is going to turn out?
Well, first, I'm a methodical dyer and very keen on measuring, sampling and testing, so I definitely recommend you try a smaller quantity first.
To judge your dye colour and strength you really need to sample. Different base yarns will dye to different shades with exactly the same amount of dye so hopefully you have a little more of the sweater yarn than you need. Measure out small amounts of yarn - it can be easier to do this by length rather than weight. When you have one you like, calculate the quantity of dye for the weight you need, for example if your sample was 10g and you are dyeing a batch of 500g then multiply what you used for the sample by 50.
How do I know it's done?
Follow the manufacturer's instructions for the dye you are using as far as the process: temperature of the dye pot, amount of acid to add and time to cook the yarn. Acid dyes are 'exhaust' dyes so the water should end up clear at the end of the process.
How do I dry it?
Rinse gently in fresh water and hang to dry!
So, how did I get on?
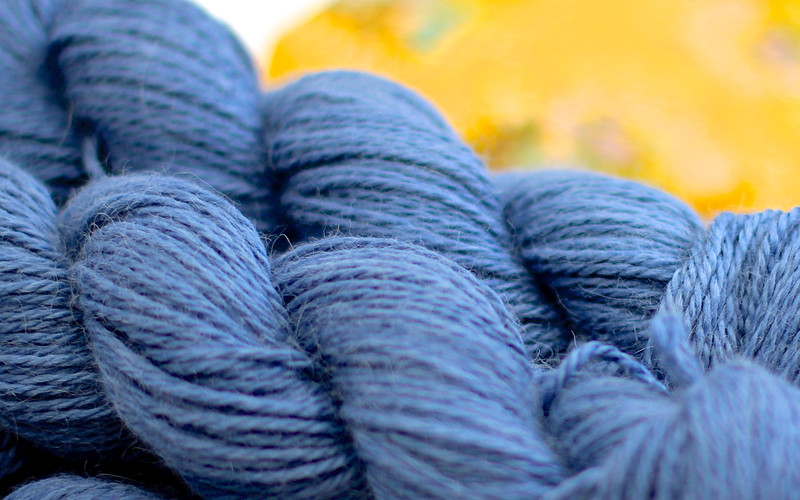
Well, I used an acid dye from Tall Yarns 'n Tales; Slate colour. I wound off a little tiny skein, weighed it, measured out a little dye and ran a test in one of the kids' toy cooking pots. Perfect size. At first it was hard to see what colour the yarn would turn but then slowly the water turned clear and I was left with a pretty little skein of a blue that I rather liked... Fortunately I'd written down the quantity of dye I'd used because then I could work out how much dye to use for the larger skeins.
I'd already heard that stainless steel pots were best for dyeing and then Annette mentioned stainless steel, but my largest "non-cooking" pot is a moderately sized stainless steel preserving pan we use for soap-making, and so I had to dye my yarn in three batches. I did feel pretty nervous about that. I'm pretty haphazard at measuring when I cook - it just doesn't come naturally .... and it took some effort to curb my wild measuring instincts and try to measure carefully.
I soaked my yarn in water while I did the maths and testing (a good long time) and then gently lowered it a skein at a time into my pot of cold water and dye.
Each batch took about 35 minutes. I tried to move it about gently, despite the temptation to regularly give it all a good stir, because I was nervous it would felt if I did. The water heated up to and occasionally over, the specified 80°C (176°F), but I didn't let it boil.
Once dyed, I rinsed it in fresh water, gently squeezed it and hung it over a washing rack to dry. It looked a bit ropey at that stage, but as it dried, it plumped up again.
And, did I get it all the same colour? Ah, no! It's not terrible, but one of the batches is clearly darker than the others. My baking tendencies must have crept in a little after all! So I don't end up with a patchy coloured cardigan, I'm alternating my skeins like Annette suggested. It's looking quite pretty actually.
Have you tried dyeing yarn? What tips can you share with us?