Hoodie tutorial
It was fantastic to make it to the final five in the Project Run & Play sew-along signature competition, and I am really excited to share my hoodie tutorial, so that you can make one too!
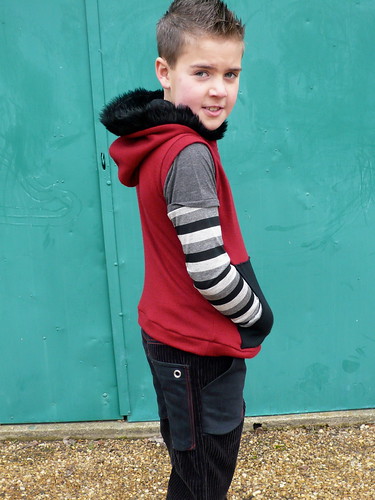
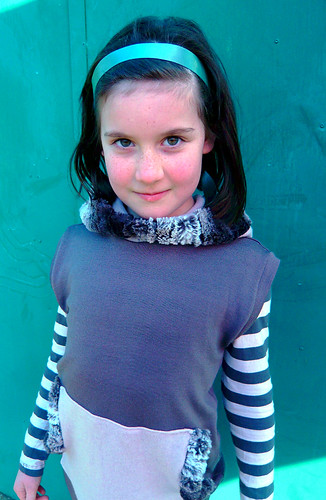
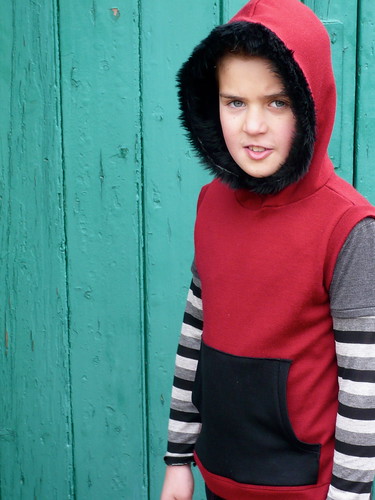
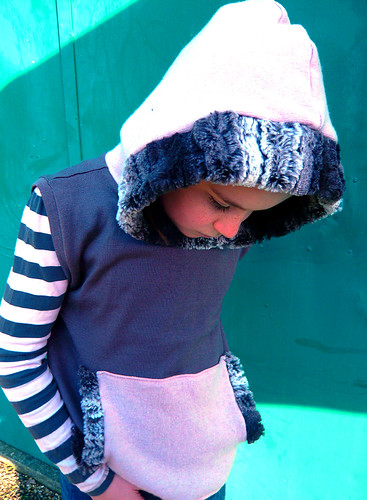
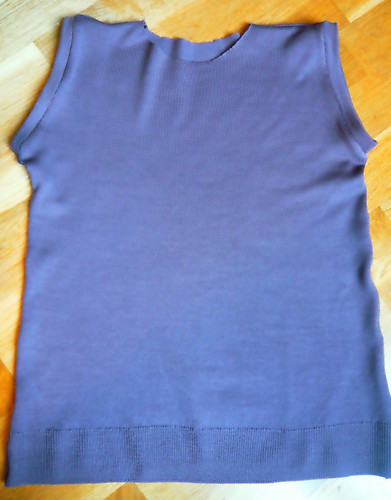
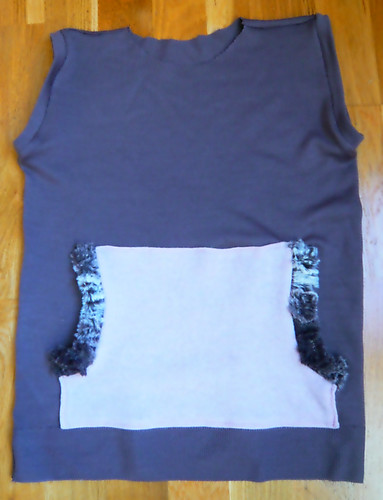
You'll see in the photos that I've have made two hoodies and they are slightly different. This pattern is very versatile, use your imagination! the red hoodie has two colours on the hood, slightly cut-away sleeves and ribbing around the pocket edges. The grey/pink hoodie has fluffy cuffs on the pocket, the sleeves are wider and the lining and outer fabric of the hood are the same colour. You could mix and match your fabrics and leave off the fluffy edge to the hood if you want. It is up to you (or the kid you are sewing for!!!).
So, let's get started!
You won't need a pattern, just a top that fits the person you are making the hoodie for and a hood that you like the shape of, which also fits. The hoodie is fairly close fitting, so choose a top that fits fairly slimly. But, If you really want a baggy body then feel free to go with that!
The materials you need are:

Or, enough jersey knit to fit a couple of sweaters laid out.
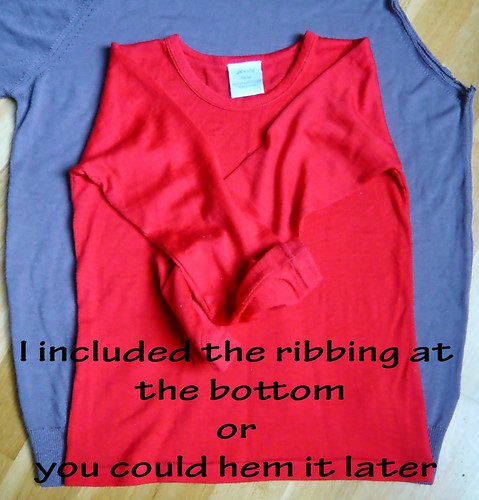
I like these merino sweaters because they are light-weight and warm. And, as I up-cycle old sweaters rather a lot I've already chopped into mine! If you have two whole sweaters you'll have more options and if you want to use more than two colours, grab more sweaters.
You'll also need a length of fluffy fabric if you plan using that. About 10cm (4") wide and long enough to stretch around your face, more if you want to edge the pockets with fluff too.
Obviously you'll need a sewing machine, scissors, pins, thread, chalk and a tape measure. An overlocker (serger) makes life easier, but it isn't essential.
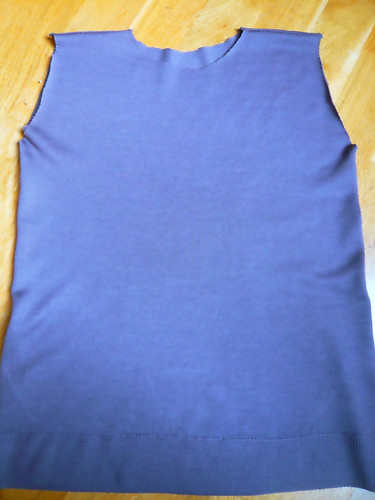
Lie your top (sleeves folded in) on to your sweater and cut around it.
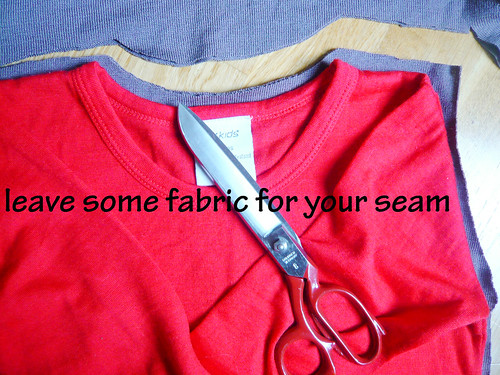
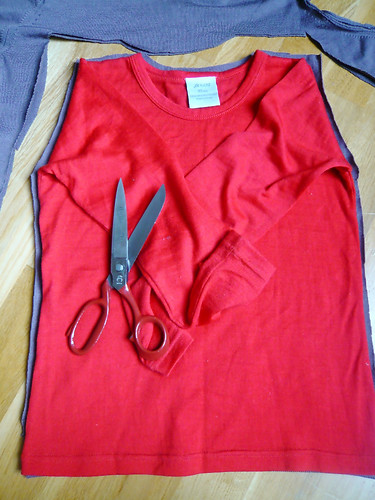
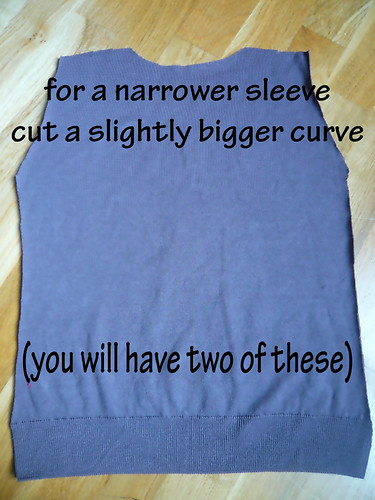
You'll have two pieces, the same size. Now is the time to make any adjustments to the sleeves.
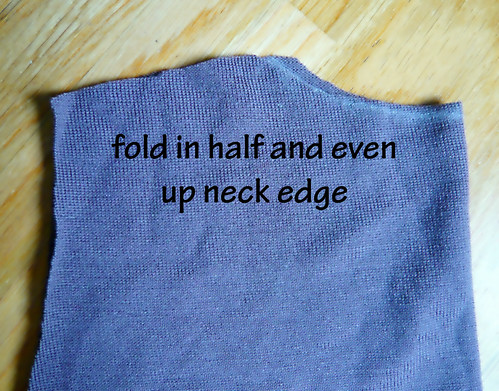
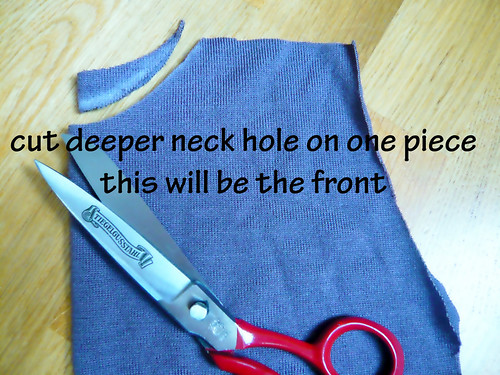
Next, even up the neck hole on one piece and cut the other a little deeper.
Do you want matching ribbing on the sleeves or contrasting? I matched mine but contrasting could look very cool.
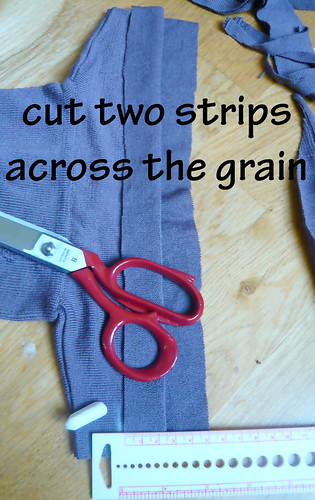
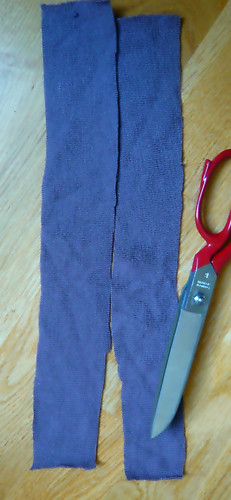
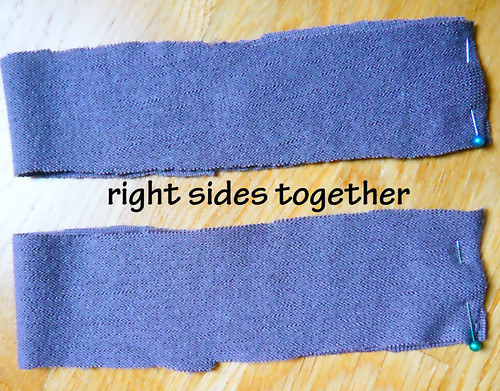
Cut two strips across the grain (side to side on your sweater) 5cm (2") wide and long enough to reach around the armhole when slightly stretched.
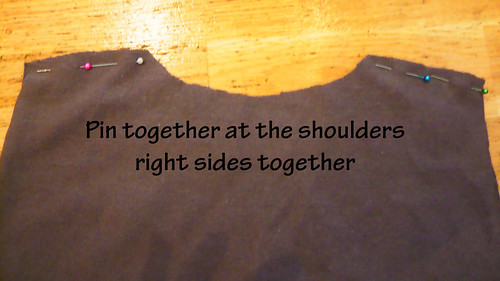
Back to the body pieces. Lay them one on top of the other, right sides together. Pin the shoulders and sew them together.
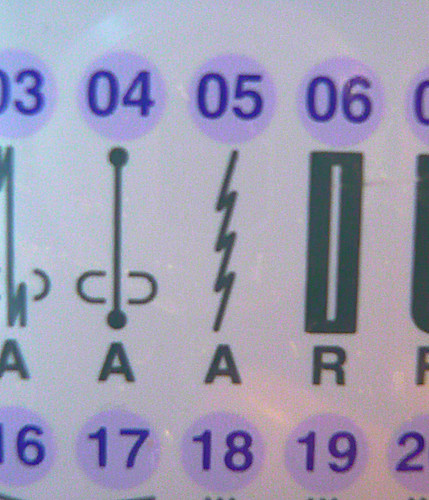
If you have an overlocker, great! If not, use a stretch stitch or a zig zag stitch for your seams. My stretch stitch looks like 5 below.
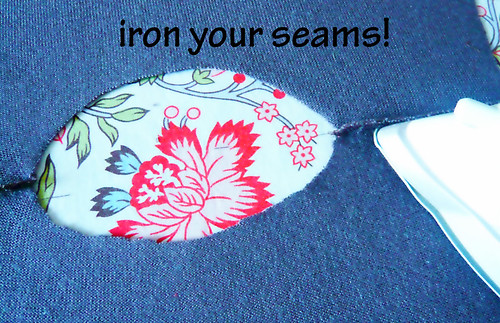
Some of you will know that a sewer's magic weapon is their iron! Ironing all your seams flat as you sew them will make your garments look great. So, turn on your iron!

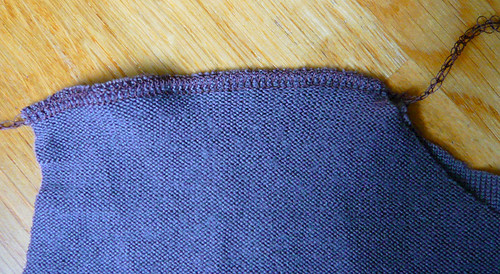
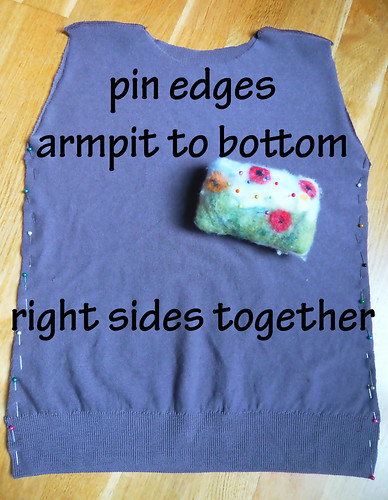
Turn the body inside out, right sides together. Pin and sew the side seams, from the bottom of the armhole, right down the side. Then, iron those seams!
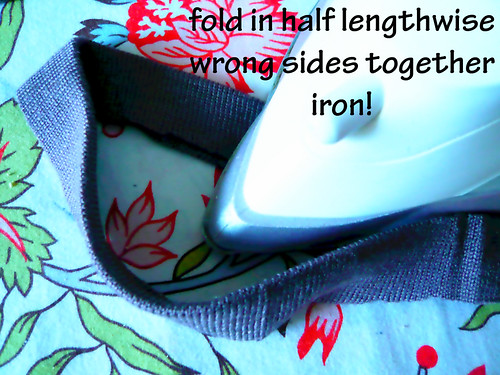
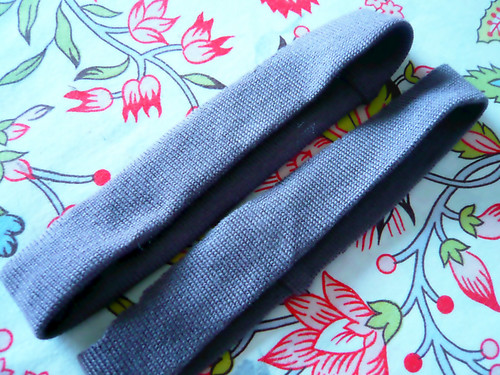
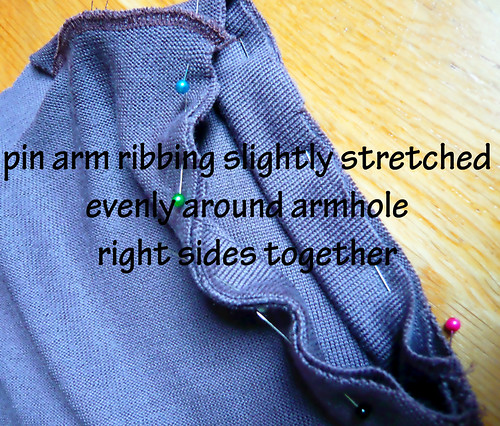
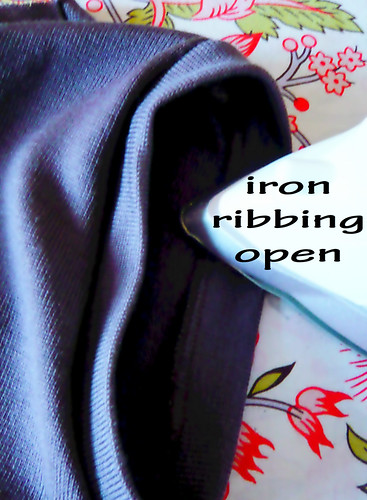
Grab those long strips you've cut for the armhole ribbing. Fold them end to end, right sides together. Pin and stitch. Turn and fold lengthwise, wrong sides together. Iron the fold.
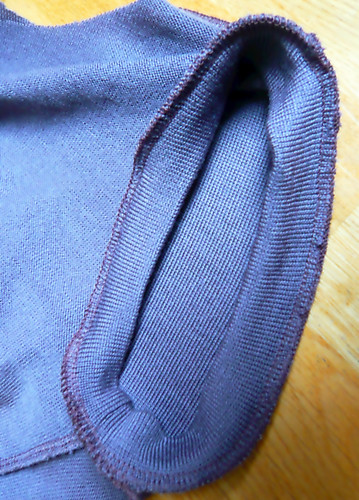
With the body inside out, ease the ribbing around the edges of the armhole. Right sides together and raw edges together, pin in place. I find it easier to stretch the ribbing around the inside of the armhole, rather than around the outside.
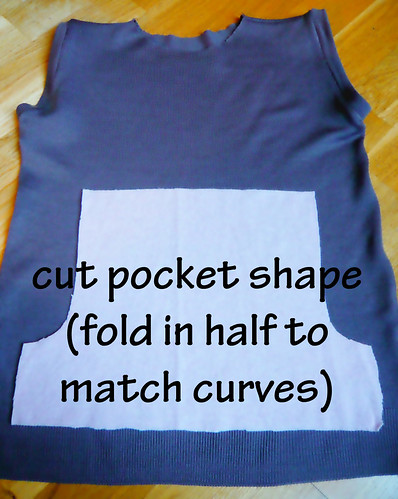
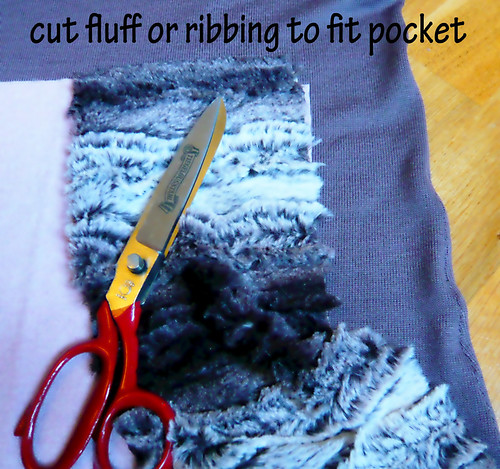
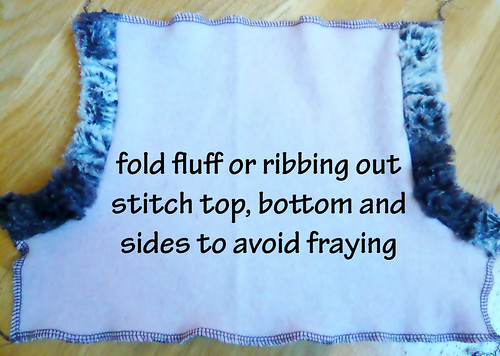
Cut a pocket shape from one of the remaining sweaters. Cut some fluff or a strip of sweater cut across the grain (side to side) about 7.5cm (3") wide, the length of the pocket openings. Fold the edging in half (like for the armhole ribbing above) and pin the raw edges to the pocket opening. Sew.
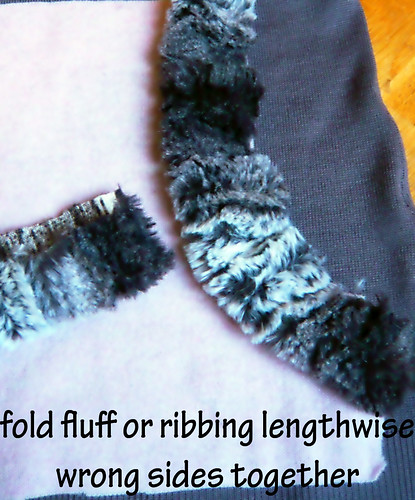
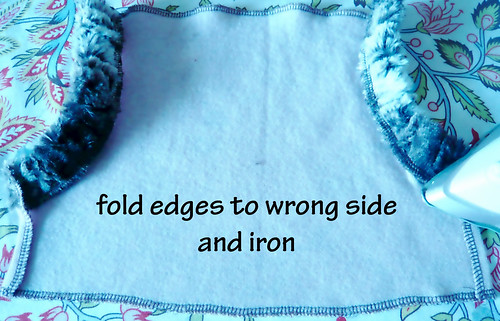
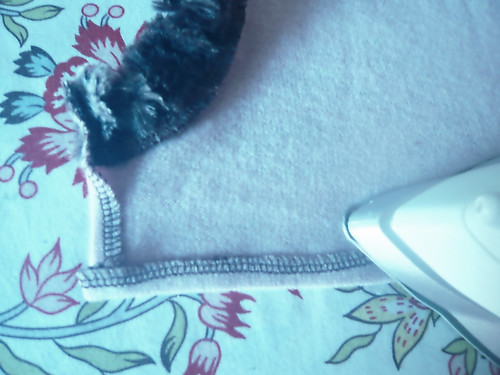
Open out the ribbing, or fluff, and iron flat. Overlock or zig zag along the raw edges at the top, sides and bottom of the pocket. With the wrong side facing you, iron in a 1.5cm (1/2") fold at these edges.
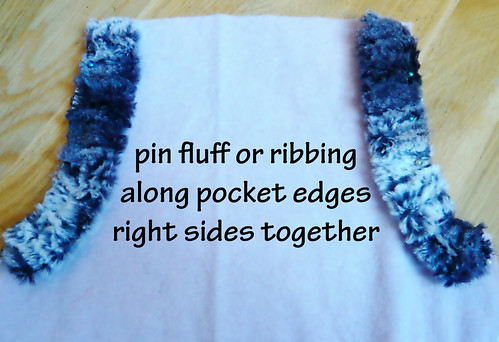
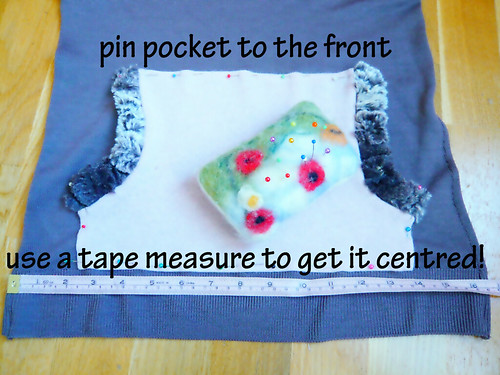
Carefully pin the pocket to the front of the body where you think it looks best.
Use a tape measure to ensure that the pocket is exactly in the middle and an even distance from the bottom.
If you are going to hem the bottom (like Gabe's), make sure there is enough fabric left to turn up.
With a long straight stitch (I used a 2.6mm stitch) sew the pocket to the body at the top, sides and bottom. Take care to sew the pocket to the front of the body only!!!
If you want to hem the body, do that now. Turn up the bottom, iron and sew. I quite like sewing a false band with my overlocker. I turn the hem back on itself and then sew around the fold.
If you don't have an overlocker, don't forget to finish the edges with an overlocking stitch or zig zag, and use a stretch stitch.
We're going to make the hood now.
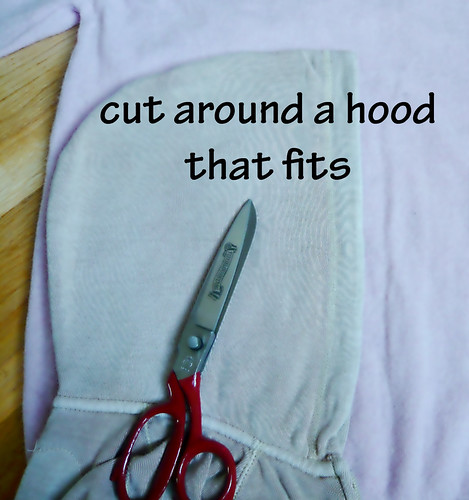
Lay a hood that fits, on top of your sweater, going with the grain (up and down the sweater). You'll do this twice, once for the outside of the hood and once for the lining. These could be the same or different, I've done one of each (the sleeves of one of your sweaters, cut open and ironed flat might be a good size for the hood pieces. Don't forget you need two layers).
Cut out the hood, lifting it up to cut a straight bottom edge. Then, cut a strip off the front of all your hood pieces, leaving about 5cm (2") at the bottom. Curve the bottom of the cut-out.


You should have four pieces cut out for your hood. They might be all the same colour (like the grey/pink hoodie) or two of each, in contrasting colours (like the red hoodie).
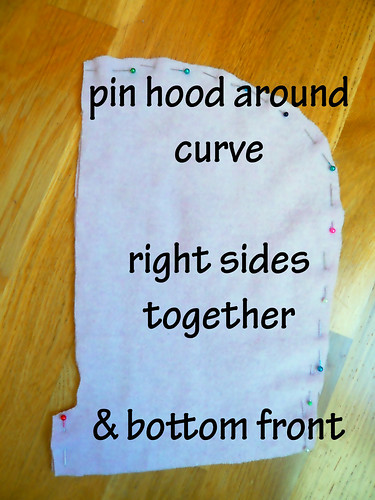
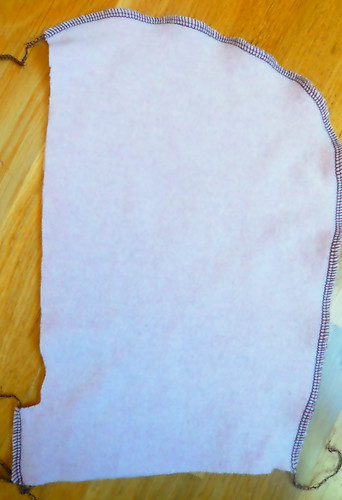
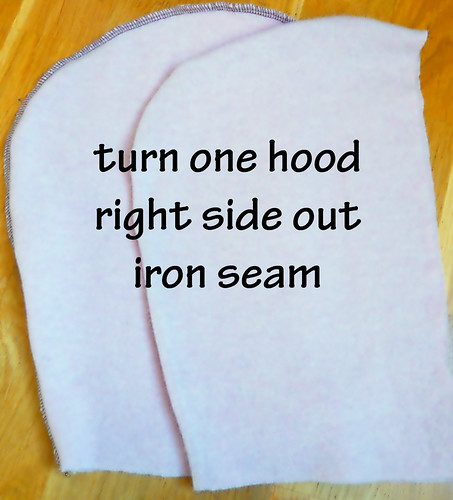
Pin and sew your hood pieces, right sides together, along the back curve and up the front at the bottom. Turn one hood inside out and the other the right way out.
If you don't want fluff in the hood, leave the next step out.
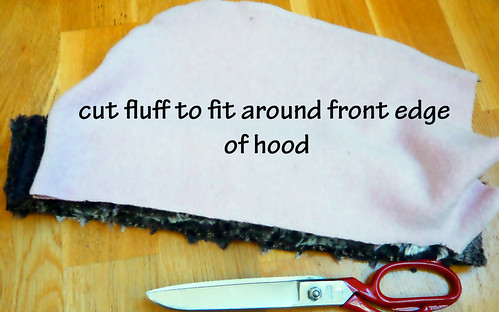
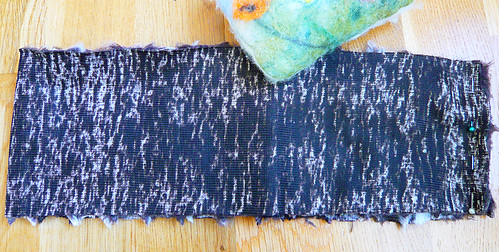
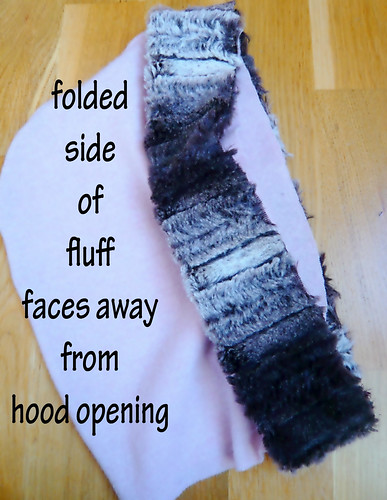
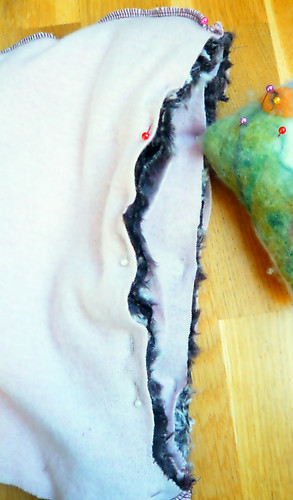
Fold the fluff for the hood end to end, right sides together, pin and sew. Next, fold the fluff in half lengthwise, wrong sides together. Ease the fluff, raw edges together, evenly around the face opening of the right-side-out hood. Raw edges together! (photos below!)
(non-fluff people come back! You need to do the next step, just ignore the fluff)
Carefully slide the wrong-side-out hood over the top of the other, so that the face openings match. Pin together the hood-fluff-hood sandwich. Sew. Phew!!!
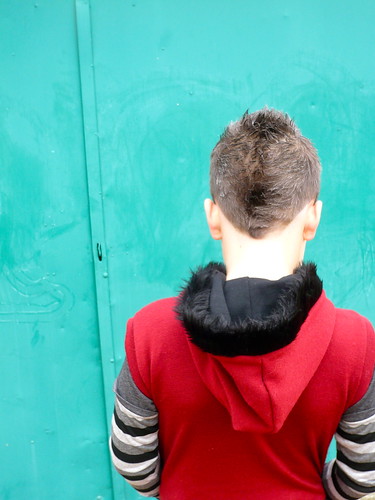
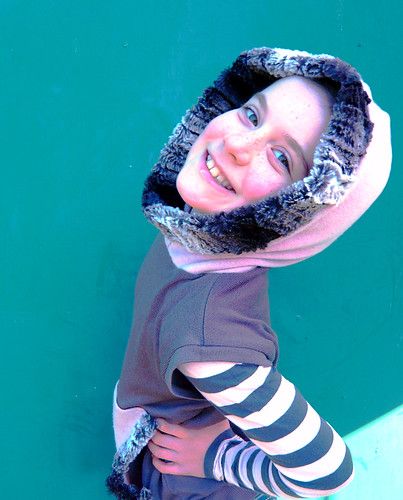
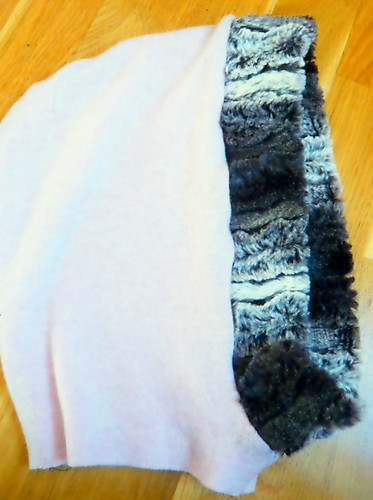
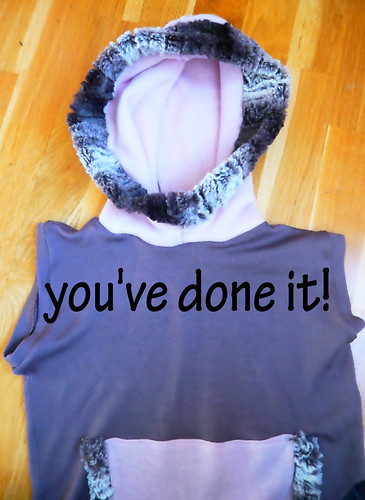
Turn the hood the right way round, through the neck hole. Wow!!! Look at that great fluffy edged hood!!!
Last step!!!
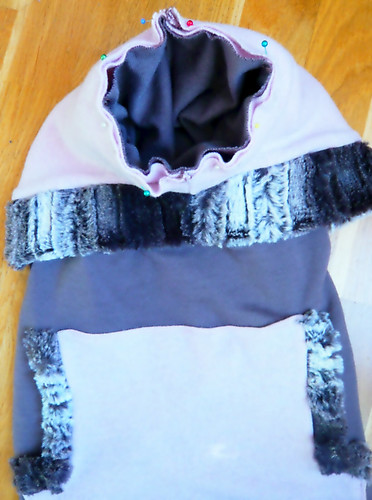
With right sides together, pin the hood neck (two layers don't forget) to the neck of the body. You might have to ease the neck evenly around the hood. Sew the hood to the body.
Take a look at the pictures below to see how I did it. If you have a multi-coloured hood, make sure the inside colour is facing out.
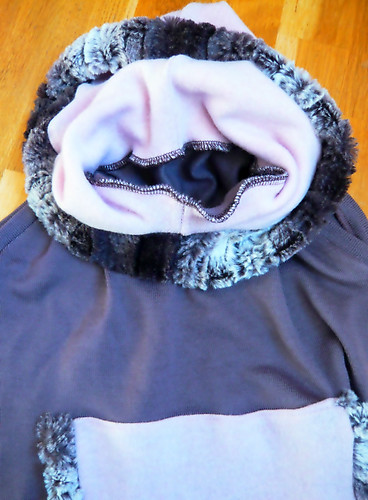
Pull your hood up and voilà!!! You're done!!!
If you have any questions, please email me and I'll do my best to answer them. I'd also love to see pictures of your hoodies!!!
If you'd like to follow my creative adventures and see what else I come up with, feel free to subscribe to Truly Myrtle or enter your email address on the right sidebar to receive updates by email. Thanks!