Circle of girls beanie
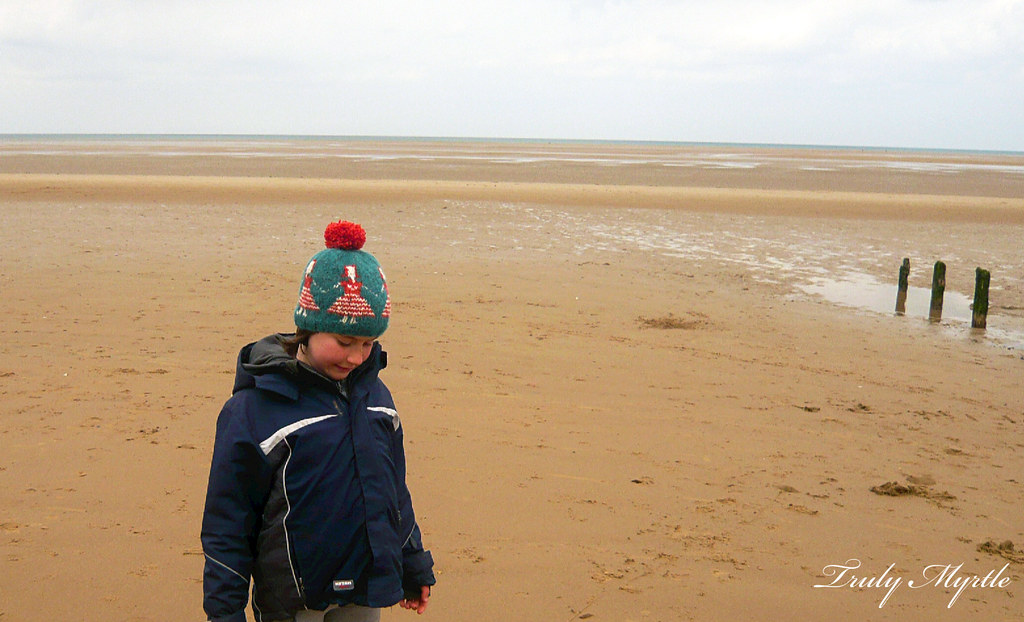
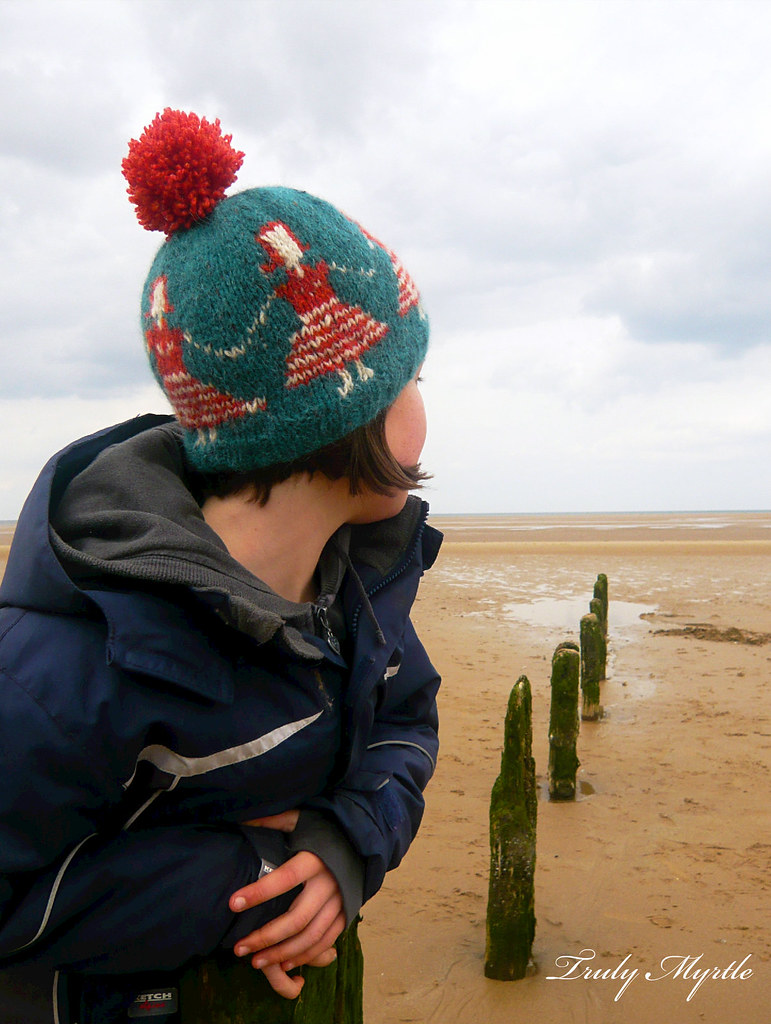
We had a lovely weekend away. It was cold and blustery but we wrapped up warm and ventured out to enjoy the wild beach. There were mud flats that stretched for miles when the tide was out and heavy grey skies that held in the rain only just long enough to wiggle toes in the sand, dip fingers in rock pools and collect a pocketful of treasures.
This is nothing like the Coromandel, New Zealand beaches of my childhood. My early experiences of beaches were stretches of sandy white and clear green-blue water. Bright and sparkling. Leaping on tip toes over hot sand and diving through warm crashing waves. In comparison, this English beach feels ancient and knowing. It has seen many generations and must have many a tale to tell. It's quite a different, raw kind of beauty.
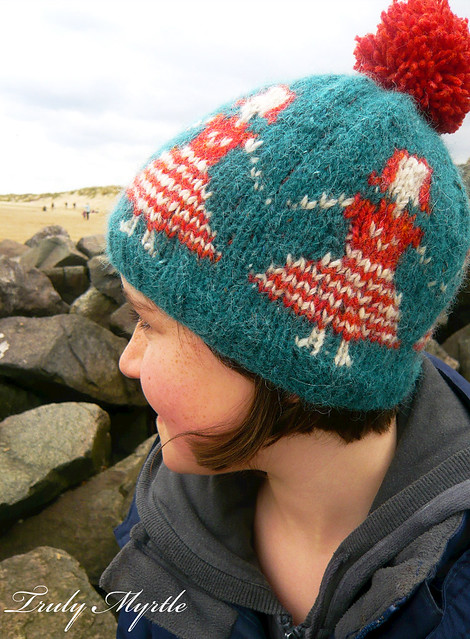
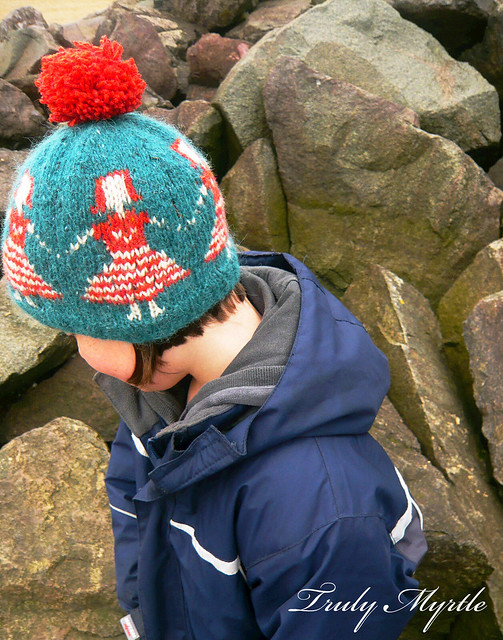
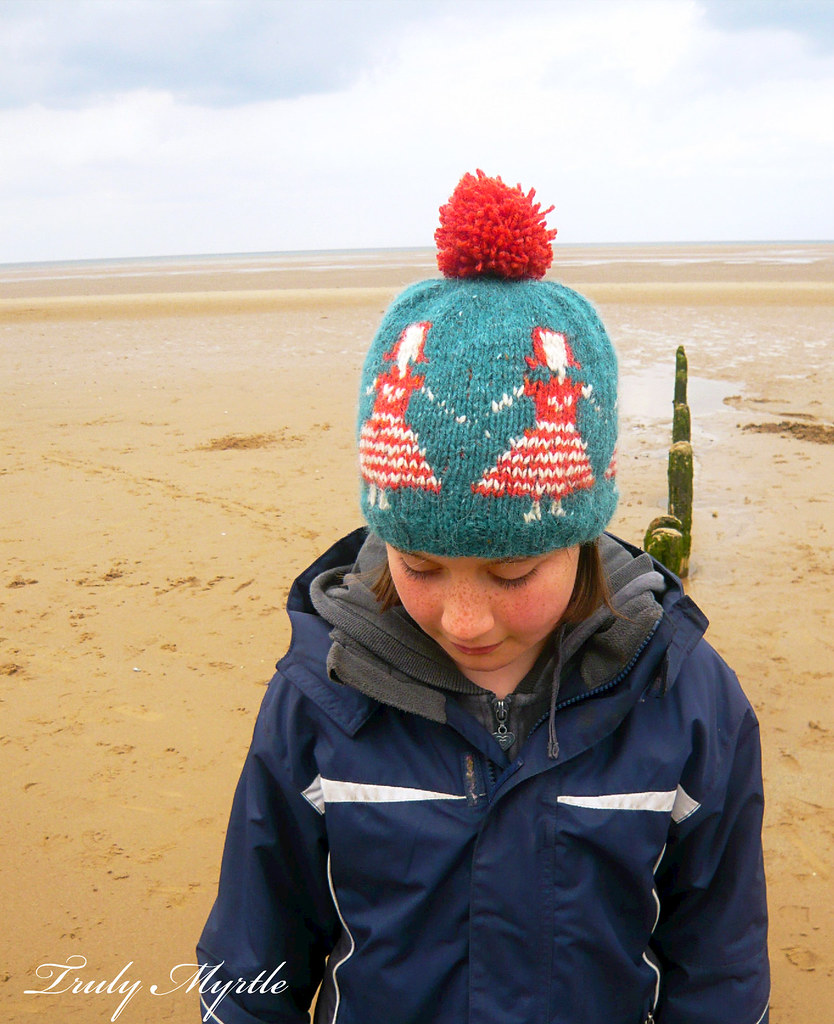
The newly finished circle of girls beanie was perfect headwear for the beach. The earthy tweed suited this place and, with its bright orange pom pom, added a bit of cheer.
Remember, I wasn't sure how I would decrease it at the crown? Once the girls were complete the answer was clear. I wanted the hat to be close fitting, not a slouch, the girls would be lost in a slouch. After decreasing by one stitch (to make 84) in my second row of green, I decreased every second row at seven points spaced evenly around. To make the decreases curve to the left, I decreased with an ssk (slipped 2 stitches to my right needle as if to knit them, inserted my left needle into the front of these stitches and
used my right needle to knit them together through their back loops). The first row I Knit 10, ssk and repeated, until the beginning of the round. Next round I just knit and the round after that, I knit 9 stitches ssk, and so on.
Trial and error convinced me to start decreasing every row quite quickly so the beanie had a flat rather than a pointy top. So, after the row where I knit 7 stitches and ssk-ed around, I skipped the just knit rows and decreased every row until only 7 stitches remained. It was easy enough to break the yarn, leaving a tail then thread the tail through the remaining loops, pulling them tight. Once secured we were done. Well, just a pom pom to go. At that point it was clear that only a pom pom would do.
Trial and error convinced me to start decreasing every row quite quickly so the beanie had a flat rather than a pointy top. So, after the row where I knit 7 stitches and ssk-ed around, I skipped the just knit rows and decreased every row until only 7 stitches remained. It was easy enough to break the yarn, leaving a tail then thread the tail through the remaining loops, pulling them tight. Once secured we were done. Well, just a pom pom to go. At that point it was clear that only a pom pom would do.
I make my pom poms the old-fashioned way. I wind a ball of yarn around and around two pieces of round card with a circle cut from the centre, like two round donuts. I used the rest of the precious orange wool, every last inch. Once it was all wound on, I carefully inserted my scissors between the cardboard donuts and snipped my way around the circumference. I then looped a length of green wool between the two cardboard rings and knotted it tightly to hold the pom pom together, and tore and pulled the cardboard pieces away. I used the green tail to sew the pom pom nice and tightly onto the top of the beanie. If you can't picture my pom pom making, here's a video that shows you how!
We're home now and there's a huge pile of washing to tackle. I'll get it washed and hung, Mr Myrtle usually takes over from there ;)
This week I'm going to have a good go at finishing my silver Buttercup and there's already something new and lovely on my needles. Also, I've heard that there's a skirt challenge on... might be just what I need to get my summer wardrobe started. I'm feeling sew inspired! Ha! See you soon.